
Add a New Vendor in Sage Intacct
The step-by-step procedure for entering a new vendor in Sage Intacct, including the 1099 fields and W-9 request workflow that must be completed before the first payment.
| Field | Value |
|---|---|
| Owner | Unassigned — needs an owner |
| Department | Accounts Payable |
| Effective date | Not set in source |
| Scope | Creating a new vendor record in Sage Intacct. Covers the fields required for payment selection and 1099 reporting. Does not cover enabling ACH or bank file payments for that vendor — see Enable ACH for a vendor — and does not cover the 1099 filing process itself. |
| Source | Accounts Payable Department/1. Vendor Master Data/Intacct Vendor Set-up.docx and Adding new vendors.docx |
Entering a vendor consistently matters for two reasons beyond simple record-keeping: the Type ID field drives which vendors appear in each payment run, and the 1099 fields determine whether the vendor can be reported correctly at year-end. A vendor missing either one creates work later that is much harder to fix than to get right now.
Procedure
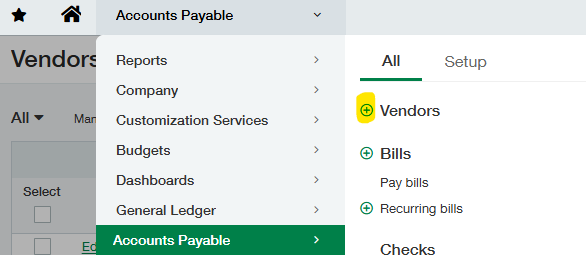
Navigate to Accounts Payable → Vendors and click the + button next to the Vendors title in the menu.
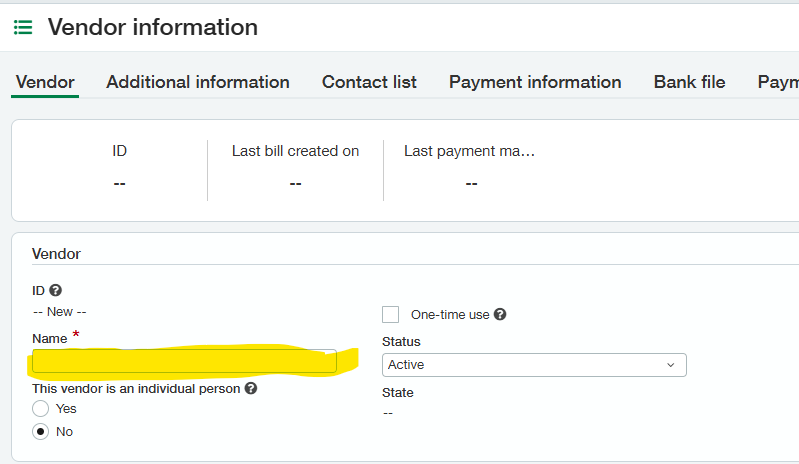
Enter the vendor's full legal name. The vendor ID generates automatically.
Complete the Print As field as well — it is required, and it is the name that appears on the check.
Populate the address, phone, and email fields. Request anything you don't have while you are setting the vendor up rather than leaving it blank.
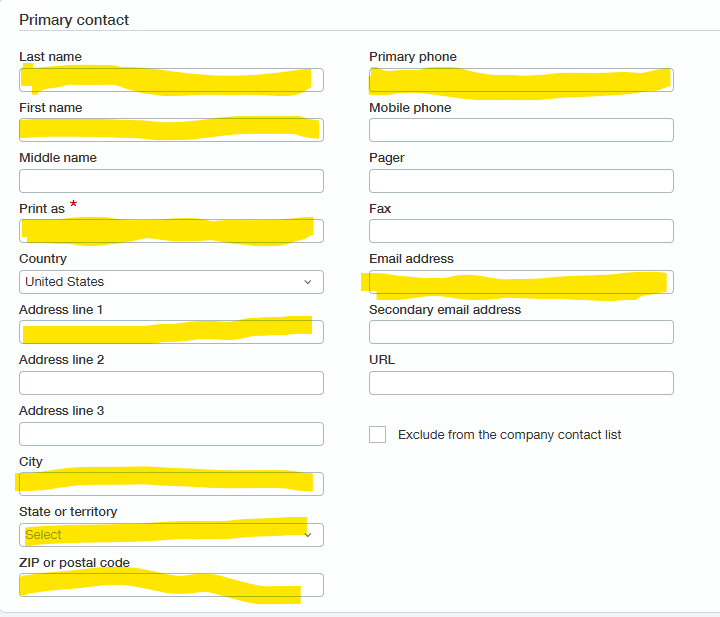
Always include the address if you have it. If this is a potential 1099 vendor and you do not have an address, email the client to request it and record the request — with the date — in the 1099 Comment field. A 1099 vendor without an address cannot be reported at year-end.
On the Additional Information tab, select the Type ID from the dropdown: Check, ACH, Credit Card, or Bank File.
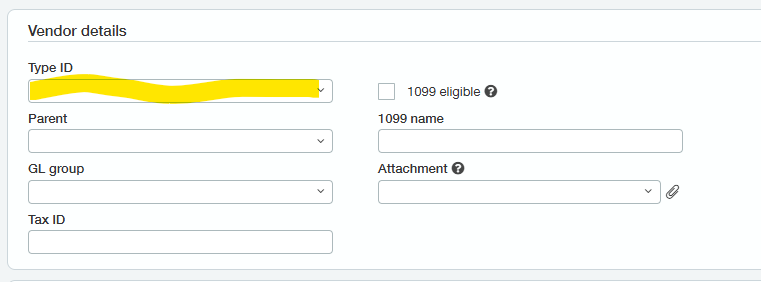
Type ID is what payment runs filter on. If it is wrong or missing, the vendor either won't appear in the payment run you expect or will appear in one where it doesn't belong.
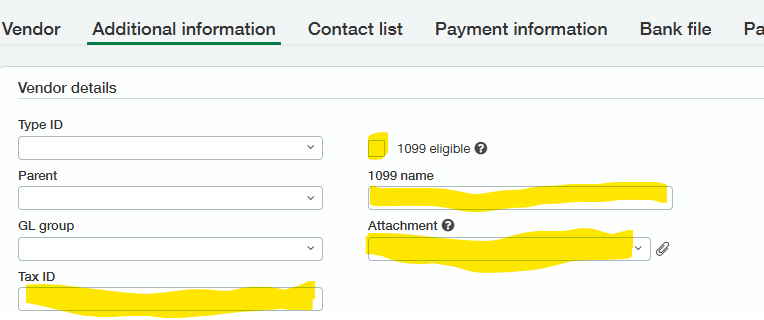
If the vendor is or may be 1099-eligible, complete the Tax ID, 1099 Eligible checkbox, 1099 Name, and Attachment fields.
- Obtain a W-9 from the vendor and attach it in the Attachment field. If no W-9 has been provided, request one.
- Review the W-9 for the Tax ID and to identify the entity type — corporation, individual, partnership, and so on.
- Add the vendor to
W9 Mail Merger.xlsx(SharePoint → Accounting Team → Accounting Documents → 1099 Reporting), completing columns A through H. - Note in the vendor's 1099 Comment field:
Added to W9 Mail Merger.xlsx on [MM/DD/YYYY]. - If the payment is an employee reimbursement, note that in the 1099 Comment field as well.
Hard-code the vendor to a specific GL account when you can. It removes a coding decision from every future invoice for that vendor.
On the Payment Information tab, set the Preferred payment method and Terms. Both are required.
- Enter the vendor's account or client number in the Vendor account number field wherever one exists — it prints on the check memo.
- If the vendor requires a separate check per invoice, clear the Merge payment requests checkbox.
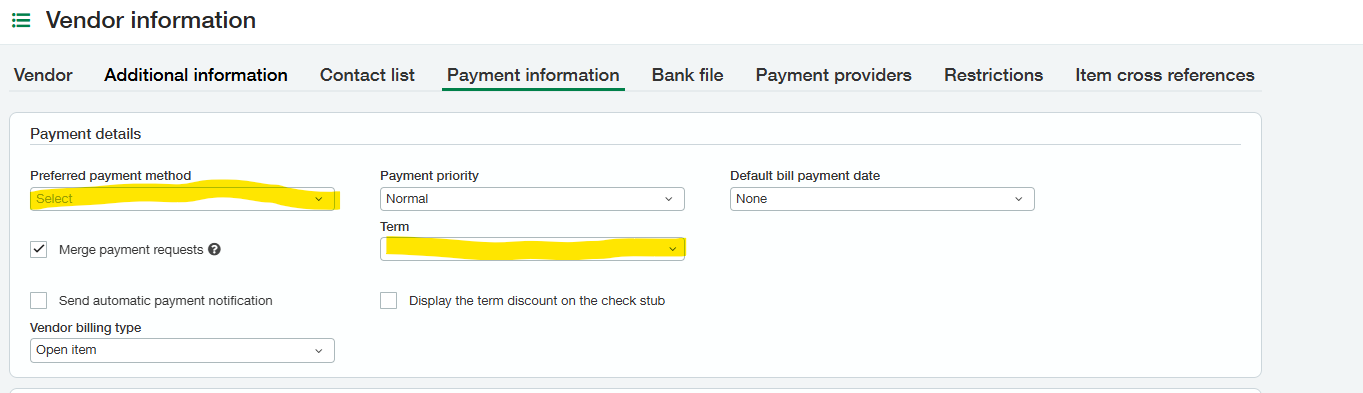
Terms must not be blank. When a bill is entered, the terms and due date pre-fill from the vendor record. If a bill shows blank terms or a due date that calculates incorrectly, the fix belongs on the vendor record — not on the bill.
Two optional tabs handle less common cases:
- Contact List — Store additional contacts, such as a different 1099 remittance address. Saved contacts become available in the Pay to and Return to dropdowns.
- Restrictions — Restrict a vendor to specific entities, locations, or departments if it should not be available globally.
Click Save, then confirm the vendor name, address, Type ID, 1099 Comment, and Terms are all populated as intended.
Expected outcome: the vendor appears in the Vendors list with an auto-generated ID and is selectable in bill entry and in payment runs filtered by its Type ID.
Required fields at a glance
Use this as a pre-save check. Every field below should be populated on a complete vendor record.
| Field | Why it matters |
|---|---|
| Name | The vendor's full legal name |
| Print As | Required; prints on the check |
| Address | Required for 1099 reporting; request it if missing |
| Type ID | Drives payment run filtering (Check, ACH, CC, Bank File) |
| 1099 Comment | Records the W-9 request date, or flags an employee reimbursement |
| Terms | Drives due date calculation on every bill |
Related documents
- Enable ACH for a vendor — the next step for vendors paid electronically
- Bank (NACHA) file payment processing policy — required validation before entering vendor banking details
- Day-to-day AP in Sage Intacct — creating vendor terms, then bills against this vendor
- Retire inactive vendors — the reverse process, for vendors that are no longer used
W9 Mail Merger.xlsxandWhat is a 1099 Transaction.docx— SharePoint → Accounting Team → Accounting Documents → 1099 Reporting