---
title: "Weekly ACH bank file upload"
sidebarTitle: "Weekly ACH upload"
description: "Generate the weekly ACH vendor payment file in Sage Intacct for both Rackson entities, validate and submit it through TD Bank, and confirm it back in Intacct."
icon: "building-columns"
---
> **For AI agents:** the complete documentation index is at [llms.txt](/llms.txt). Append `.md` to any page URL for its markdown version.
This process covers generating the weekly ACH vendor payment file in Sage Intacct for **Rackson Restaurants (RRS)** and **Rackson Cayenne (RCY)**, uploading it to TD Bank through the Secure File Transfer portal, saving a record of each upload, and confirming the payment file back in Sage Intacct.
**Source:** `Weekly ACH Bank File Upload Process Doc - RRS & RCY.docx`, with the accompanying recording `Weekly ACH Bank File Upload - RRS & RCY.mp4` (6m 47s).
**Systems:** Sage Intacct (Rackson) · TD Bank Business Connect / Secure File Transfer · OneDrive
## Before you start
- **Confirm the vendor bills to be paid have been approved** and that you have a total dollar amount to expect for RRS and RCY. This is typically communicated by the AP Processor via Teams once bills are ready to be paid.
- You will need access to **Sage Intacct** (Rackson entity), the **TD Bank Business Connect** portal for Rackson Restaurants LLC, and the shared **OneDrive ACH Payment Files** folder.
- **Bank login requires a token code.** Request that from Jessie at the time of login.
**ACH files are uploaded twice per entity per week:** once to **ACH Test (TACH)** to validate the file, and once to **ACH** for actual submission. Both uploads are required.
## Steps
Confirm in Teams or email that the vendor bills are ready to be paid, and **note the expected total for each entity.** In the source example, Erica Dwyer confirmed Rackson ACHs were ready with an RRS total of $151,269.61 and an RCY total of $474.14.
**Use these totals later to confirm the generated file amounts match.**
 Go to **Cash Management**, then under **Payment Files** select **ACH file generation**.
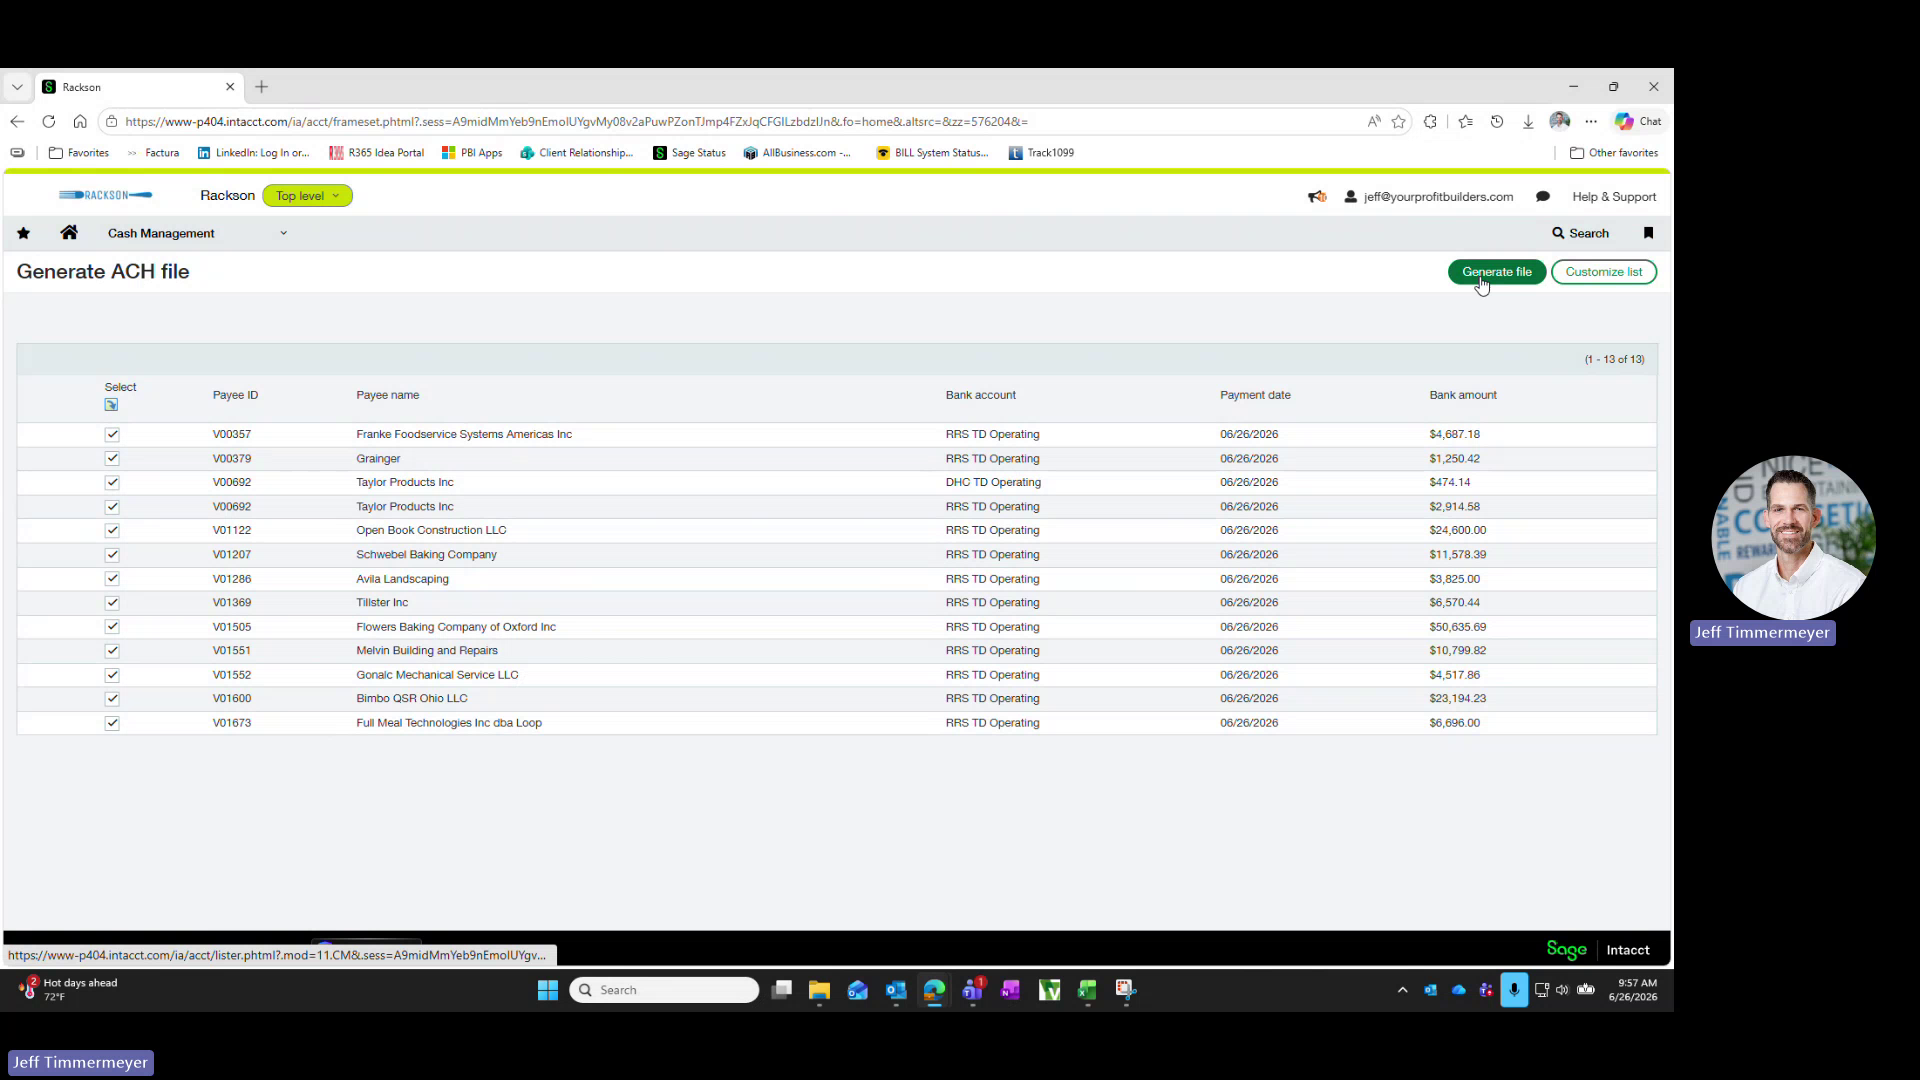
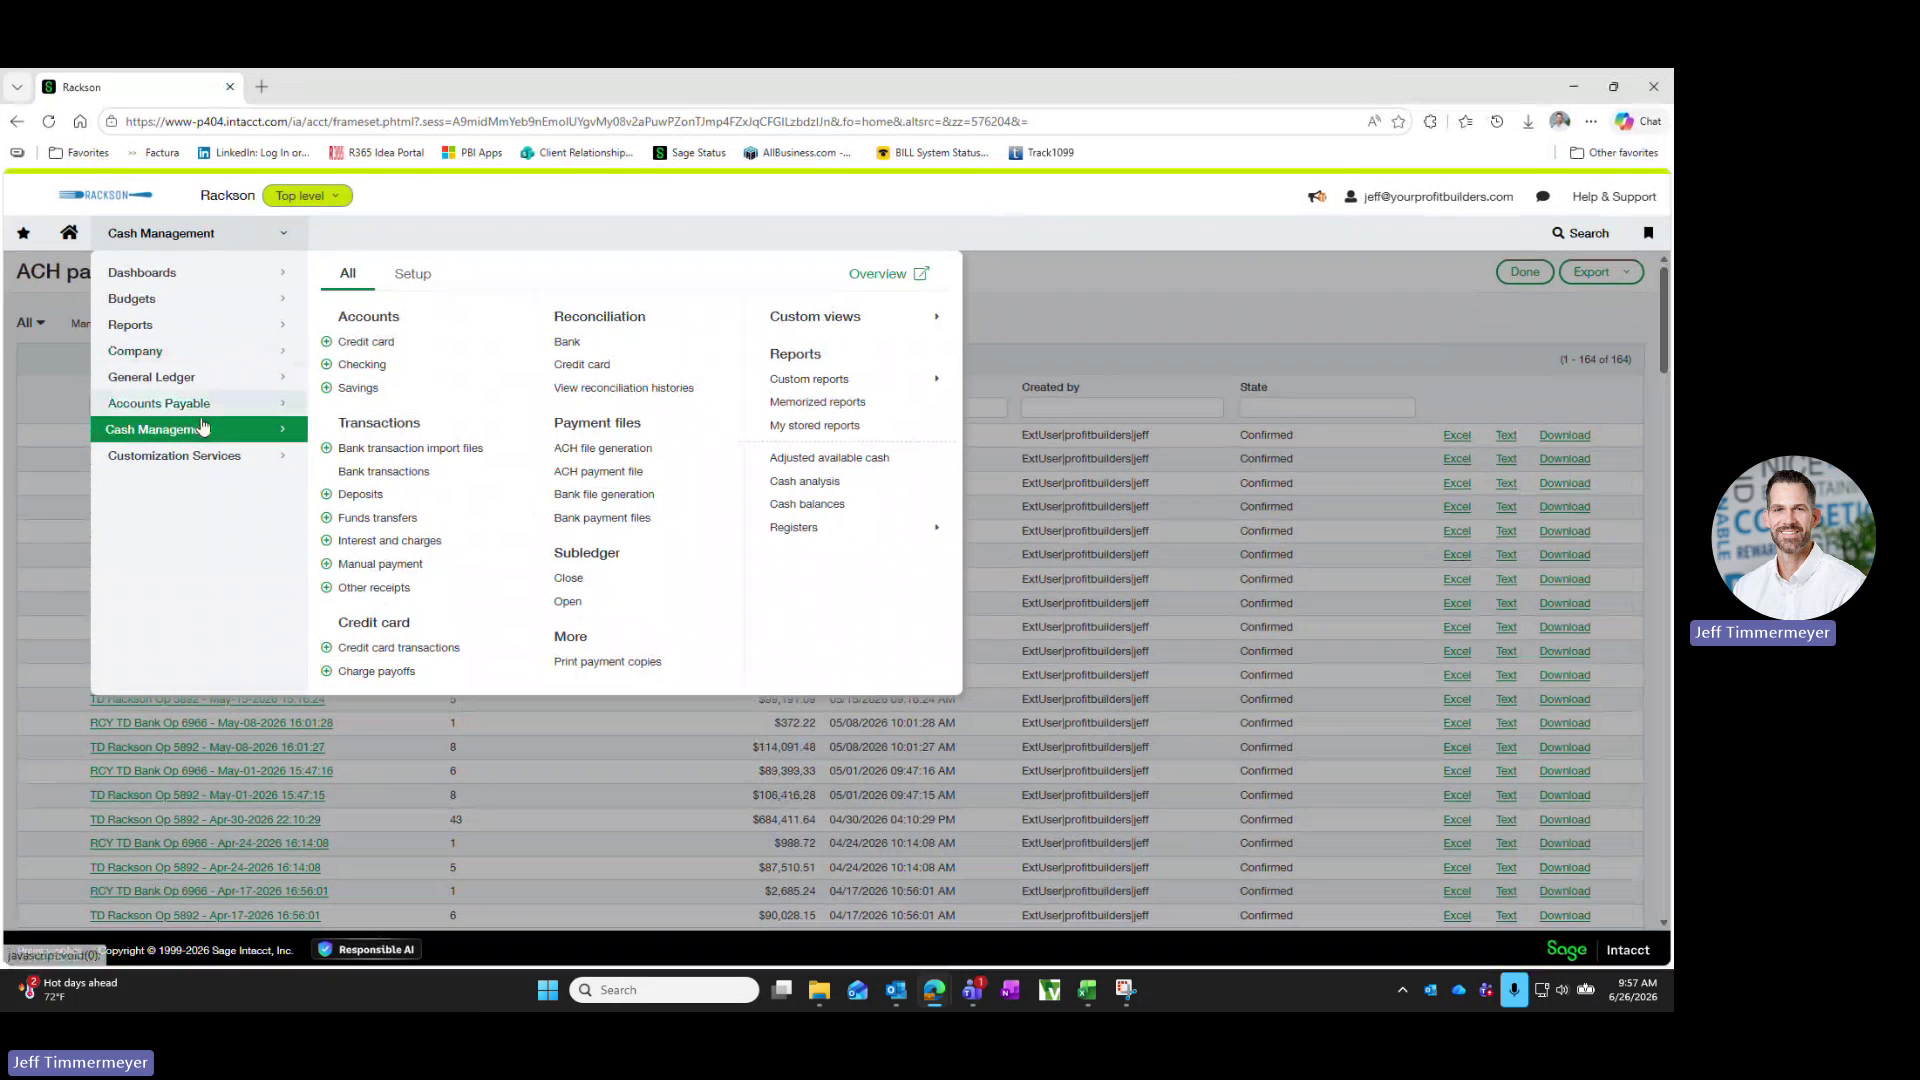 On the **Generate ACH file** screen, confirm all payments to be included are checked in the **Select** column, then click **Generate file** in the top right corner.
Sage Intacct **automatically splits the payments into a separate file for each bank account.** In the source example, RRS TD Operating and DHC TD Operating (RCY) payments were split into two files.
On the **Generate ACH file** screen, confirm all payments to be included are checked in the **Select** column, then click **Generate file** in the top right corner.
Sage Intacct **automatically splits the payments into a separate file for each bank account.** In the source example, RRS TD Operating and DHC TD Operating (RCY) payments were split into two files.
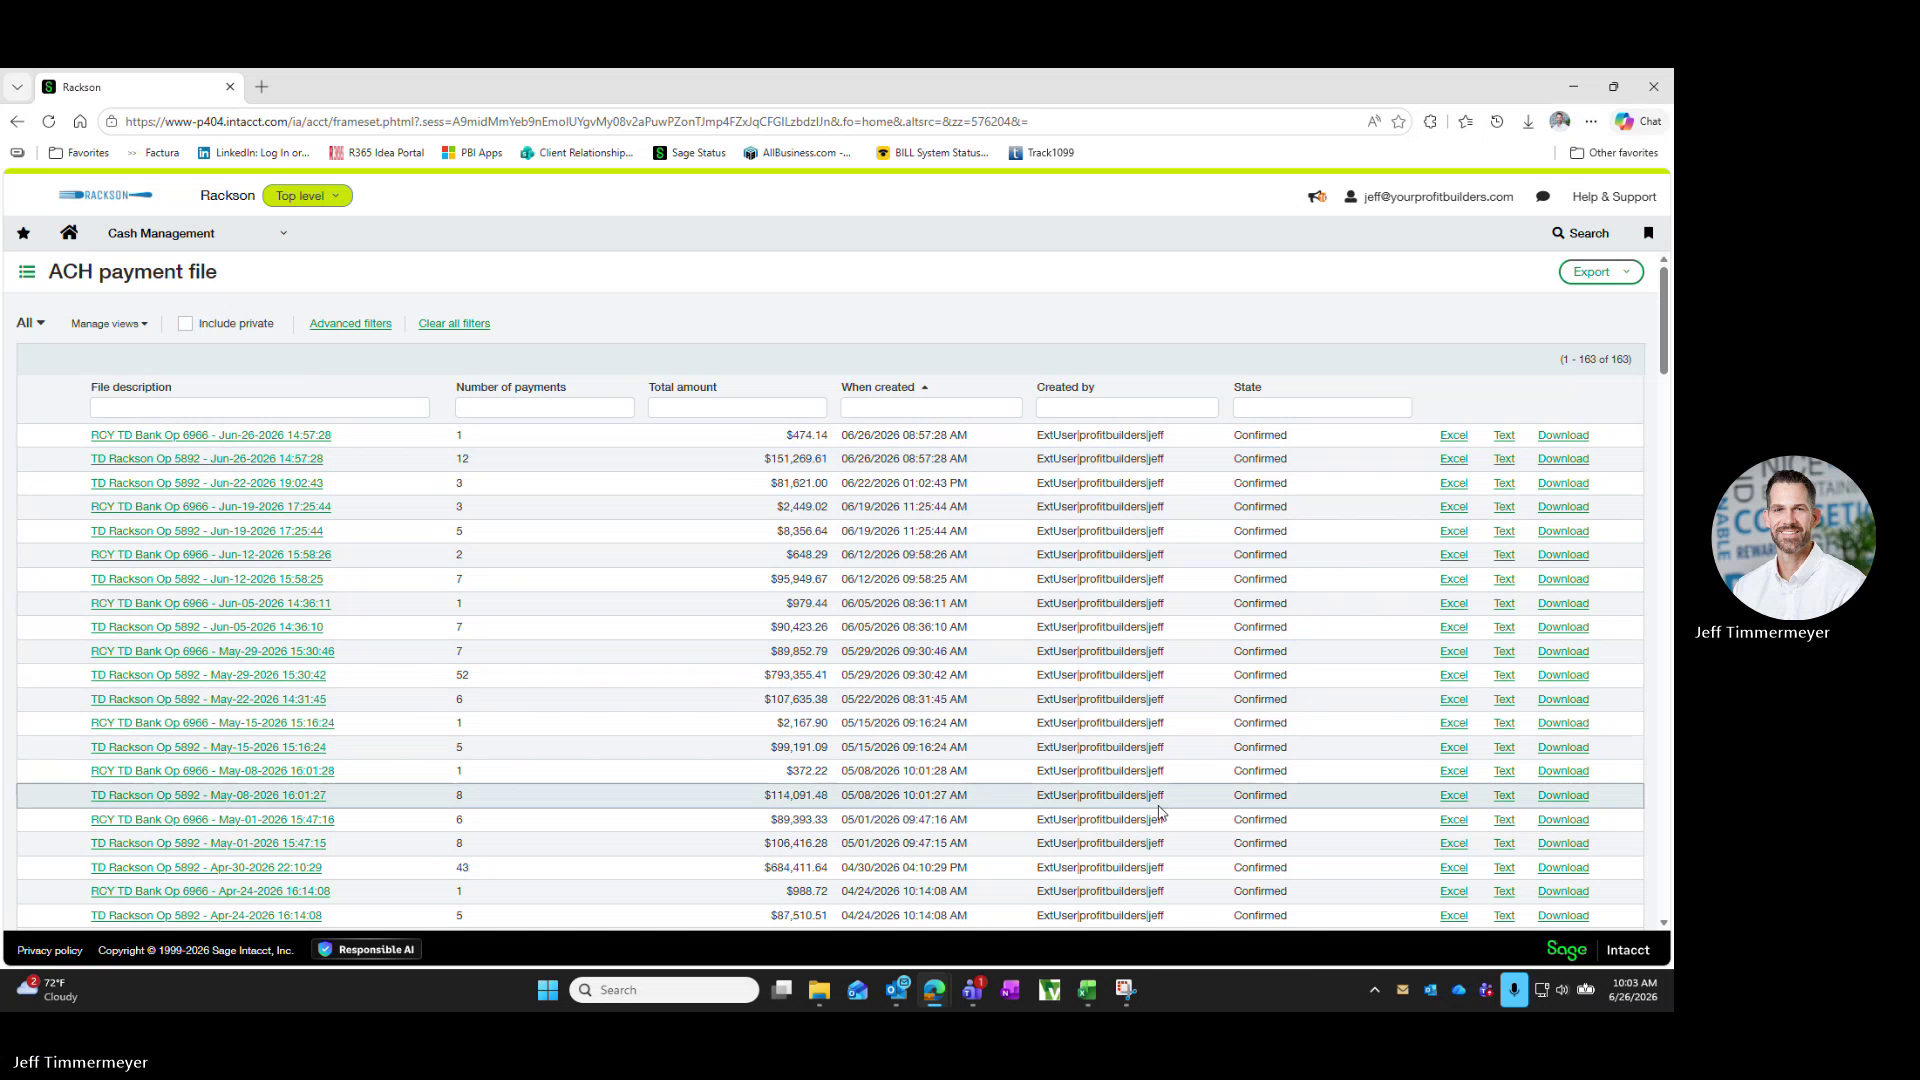
 After generation you are returned to the ACH payment file list. The new file(s) appear at the top in a **Pending** state, one per entity.
**Confirm the Total amount on each new row matches the totals confirmed in step 1.**
After generation you are returned to the ACH payment file list. The new file(s) appear at the top in a **Pending** state, one per entity.
**Confirm the Total amount on each new row matches the totals confirmed in step 1.**
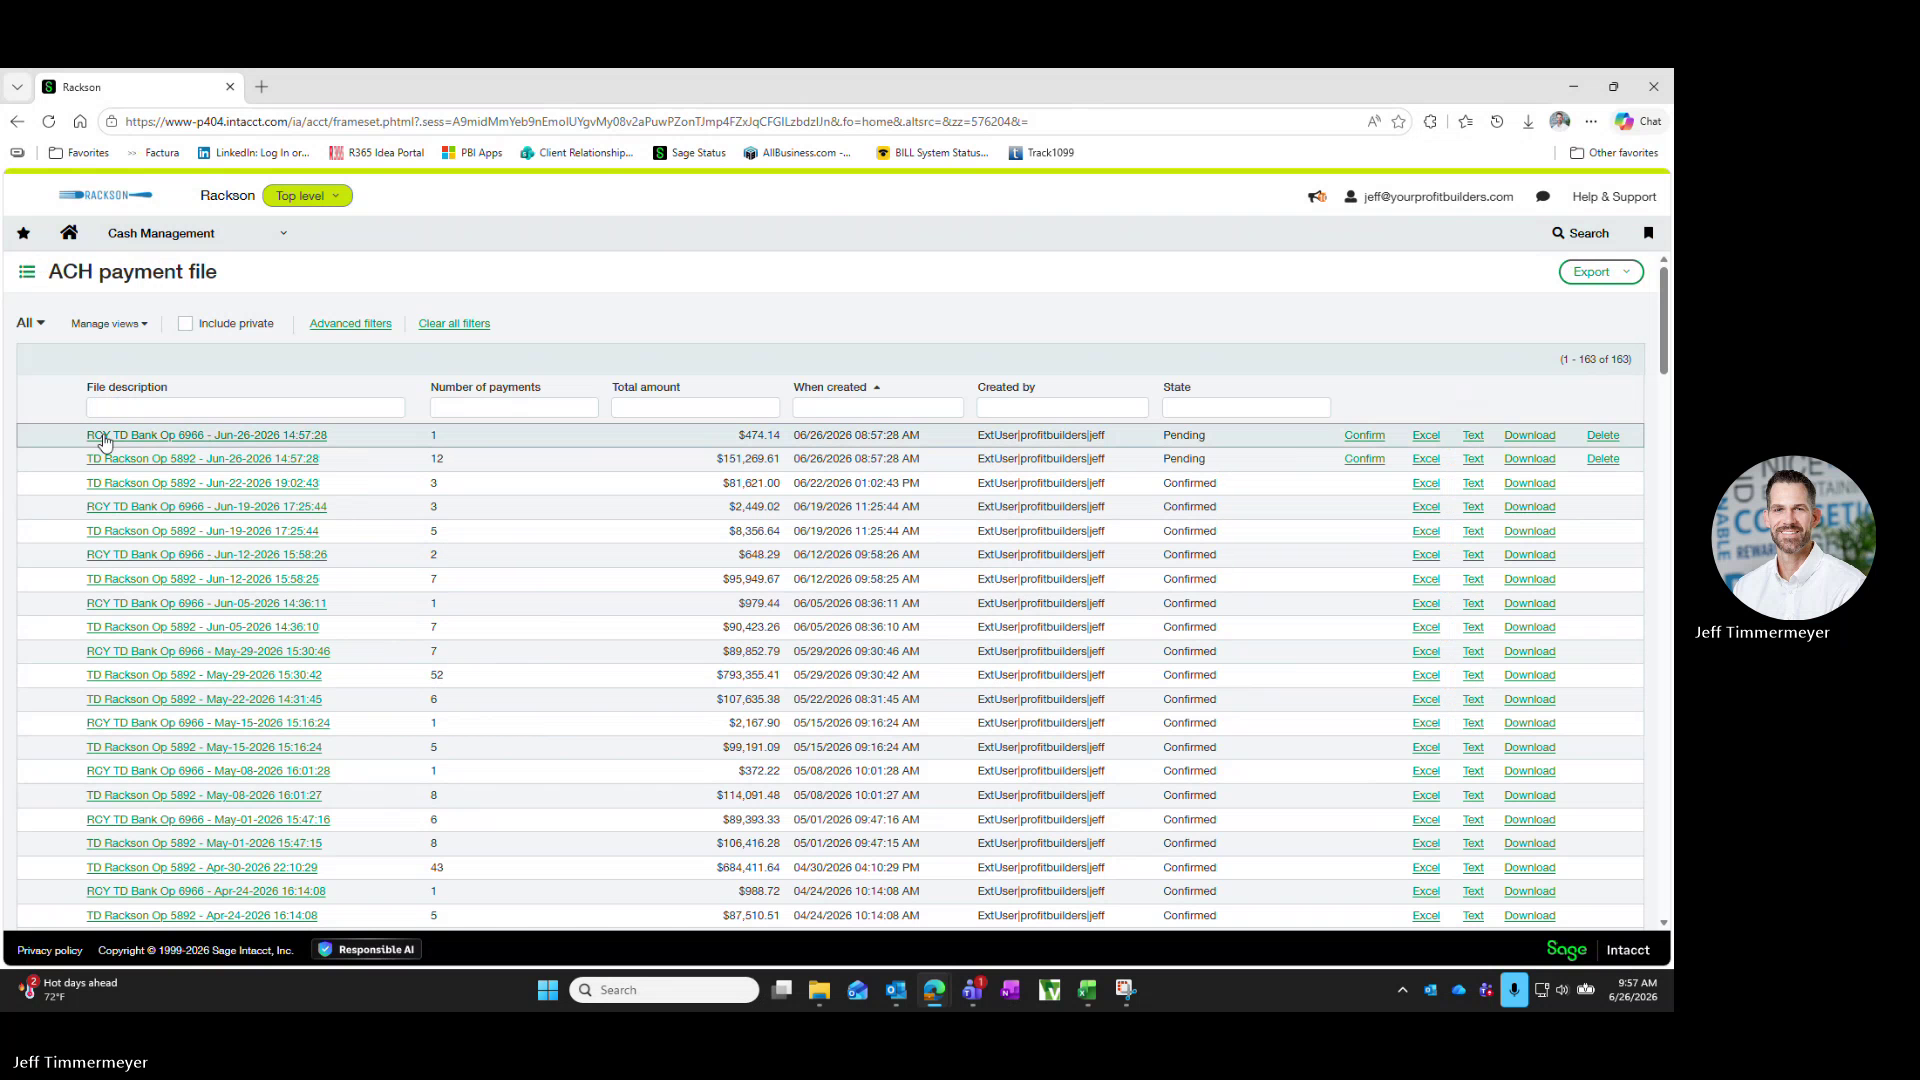 For each new **Pending** row, click **Text** in that row to download the ACH file. This downloads a `.ach` text file to your Downloads folder for each entity.
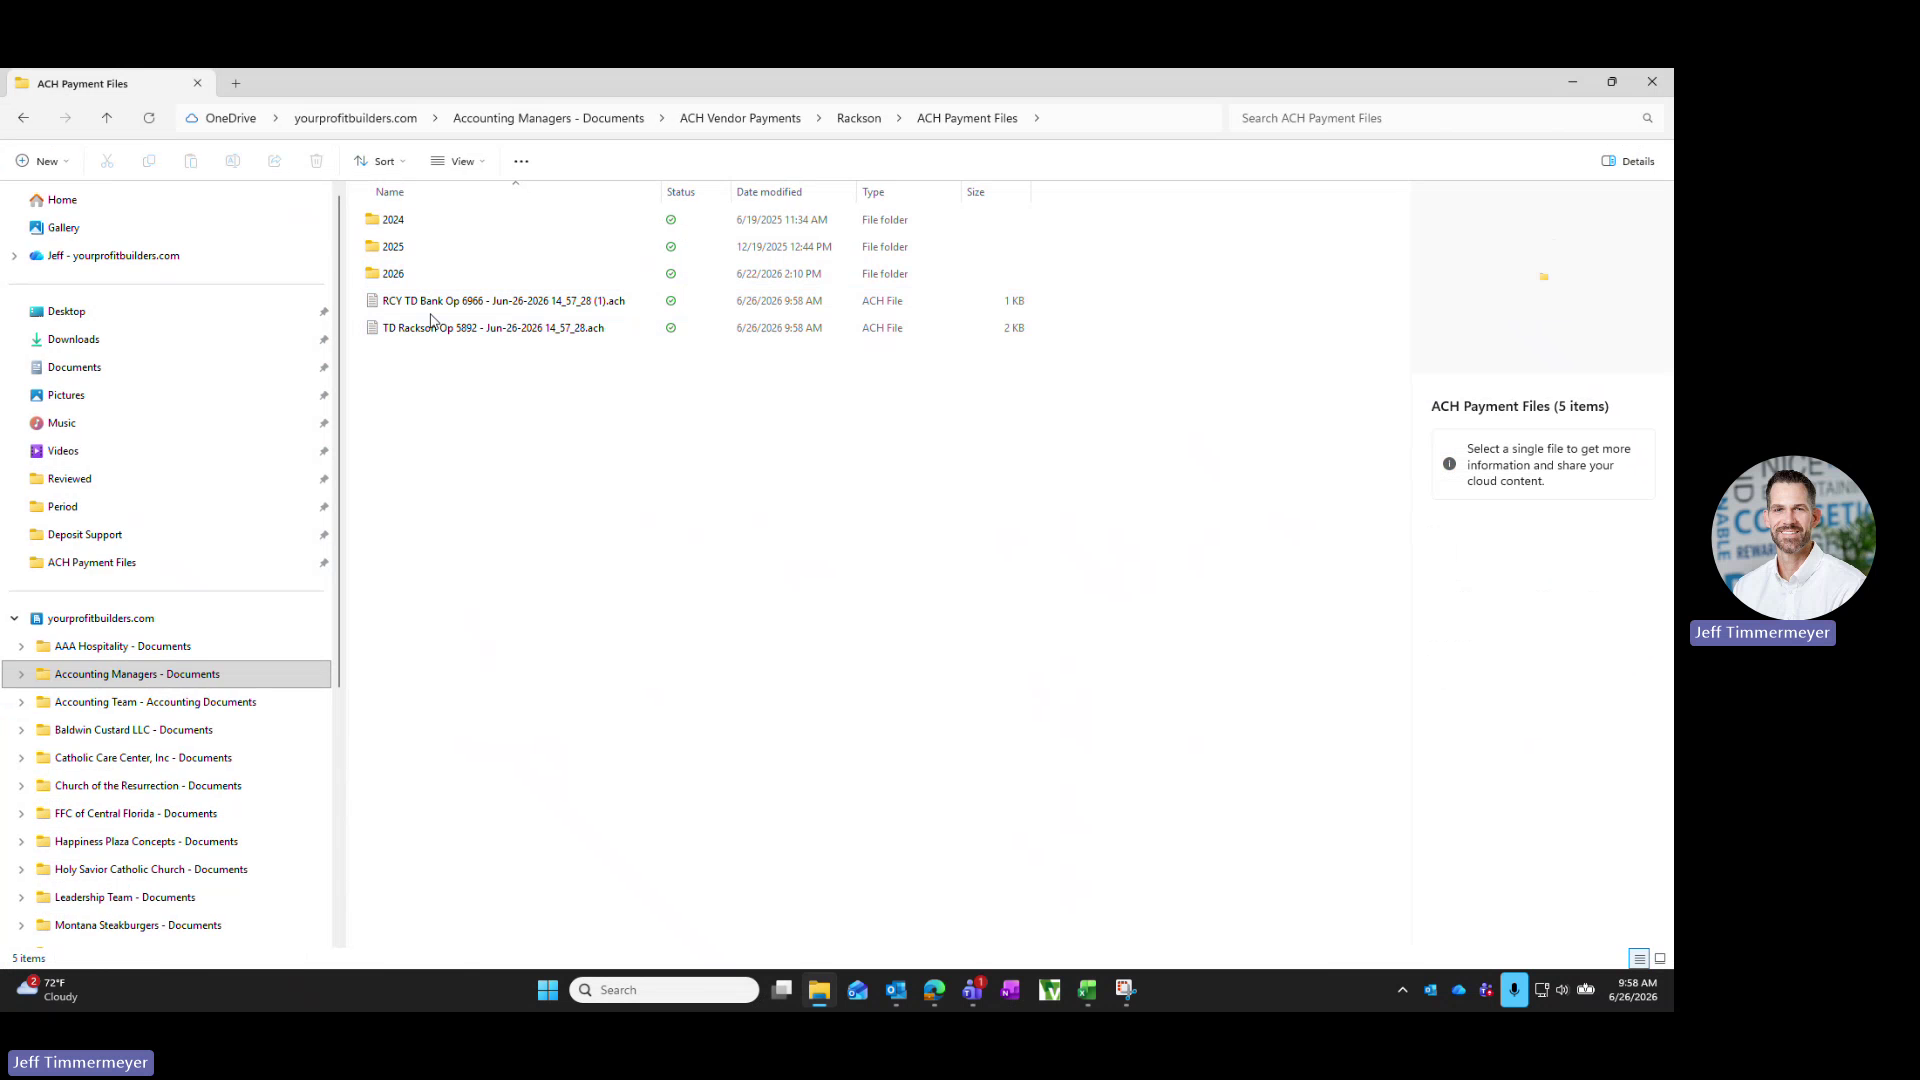
Move each downloaded `.ach` file from Downloads into the shared OneDrive folder:
```text
Accounting Managers - Documents \ ACH Vendor Payments
\ Rackson \ ACH Payment Files \ 2026
```
**Keep the file names as downloaded** so the file description in Intacct and the saved file match.
For each new **Pending** row, click **Text** in that row to download the ACH file. This downloads a `.ach` text file to your Downloads folder for each entity.
Move each downloaded `.ach` file from Downloads into the shared OneDrive folder:
```text
Accounting Managers - Documents \ ACH Vendor Payments
\ Rackson \ ACH Payment Files \ 2026
```
**Keep the file names as downloaded** so the file description in Intacct and the saved file match.
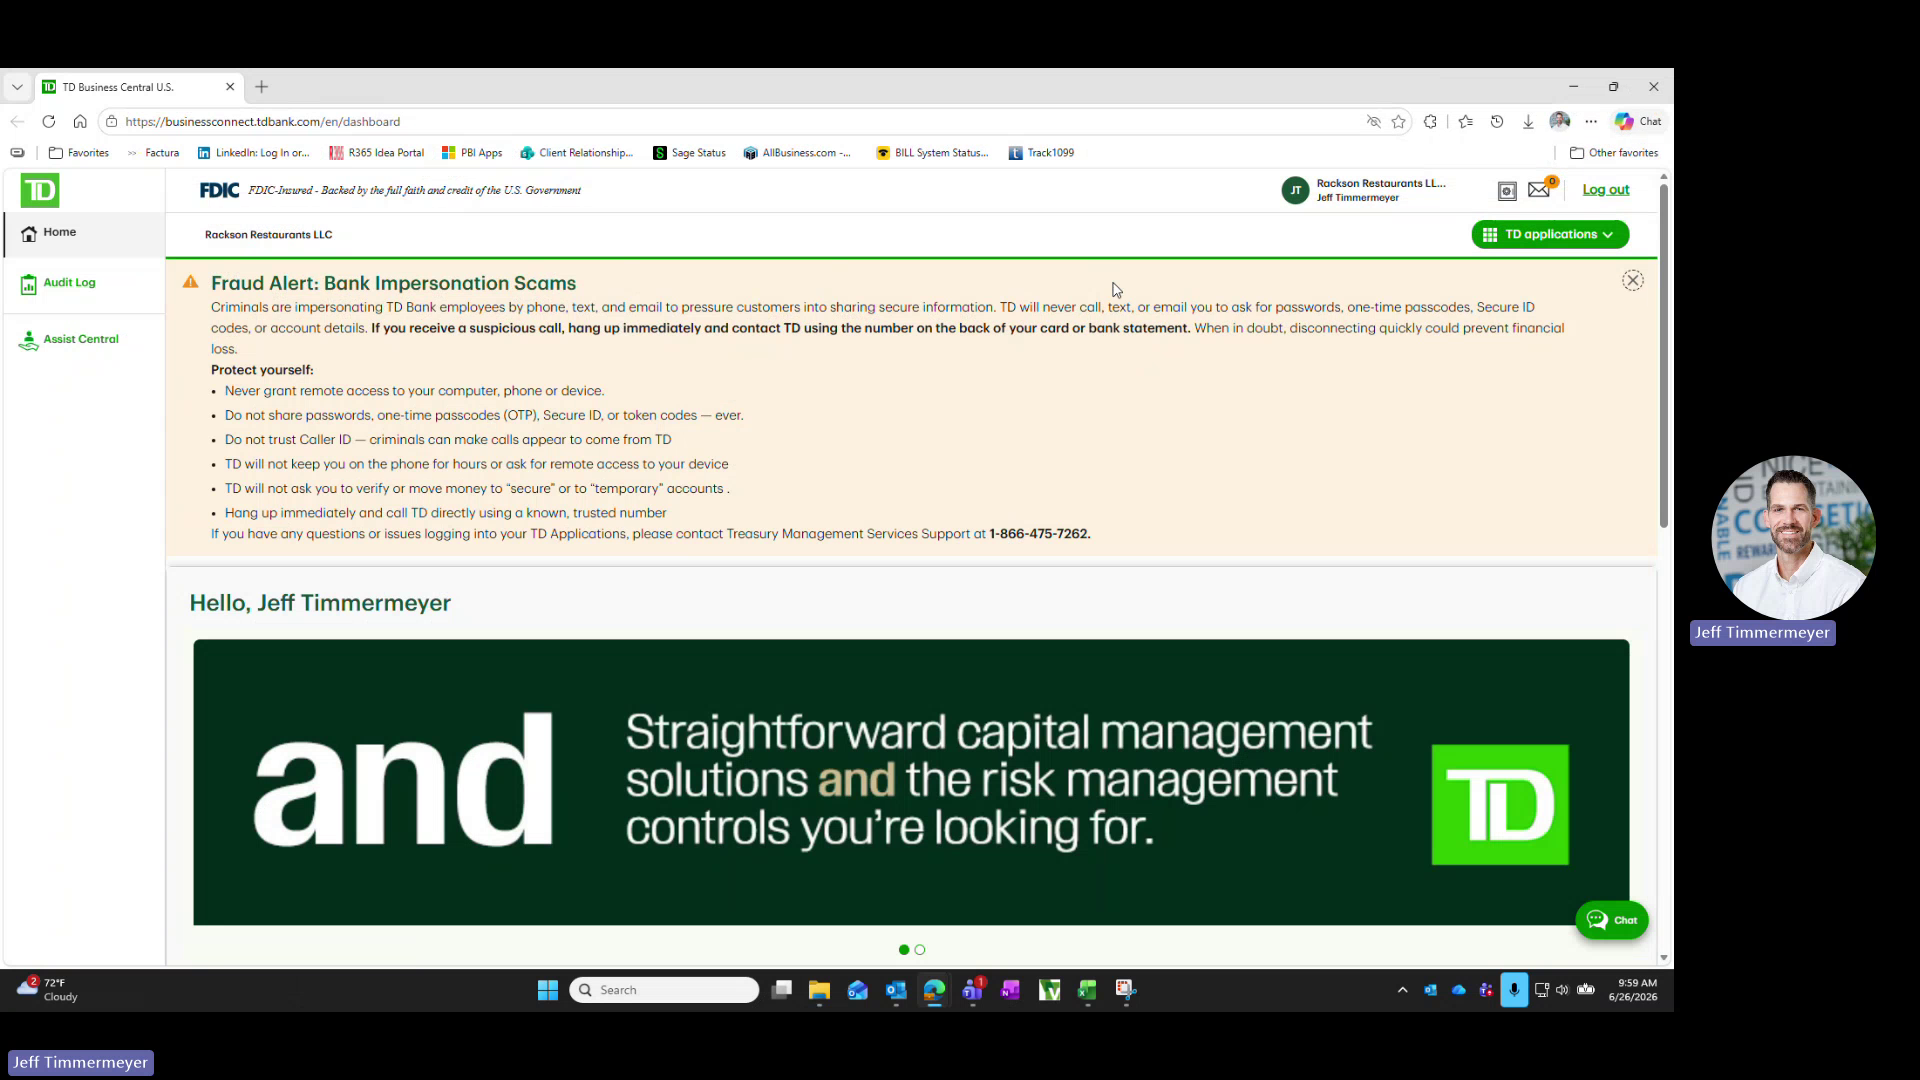
 Go to `businessconnect.tdbank.com` and log in under the **Rackson Restaurants LLC** company profile.
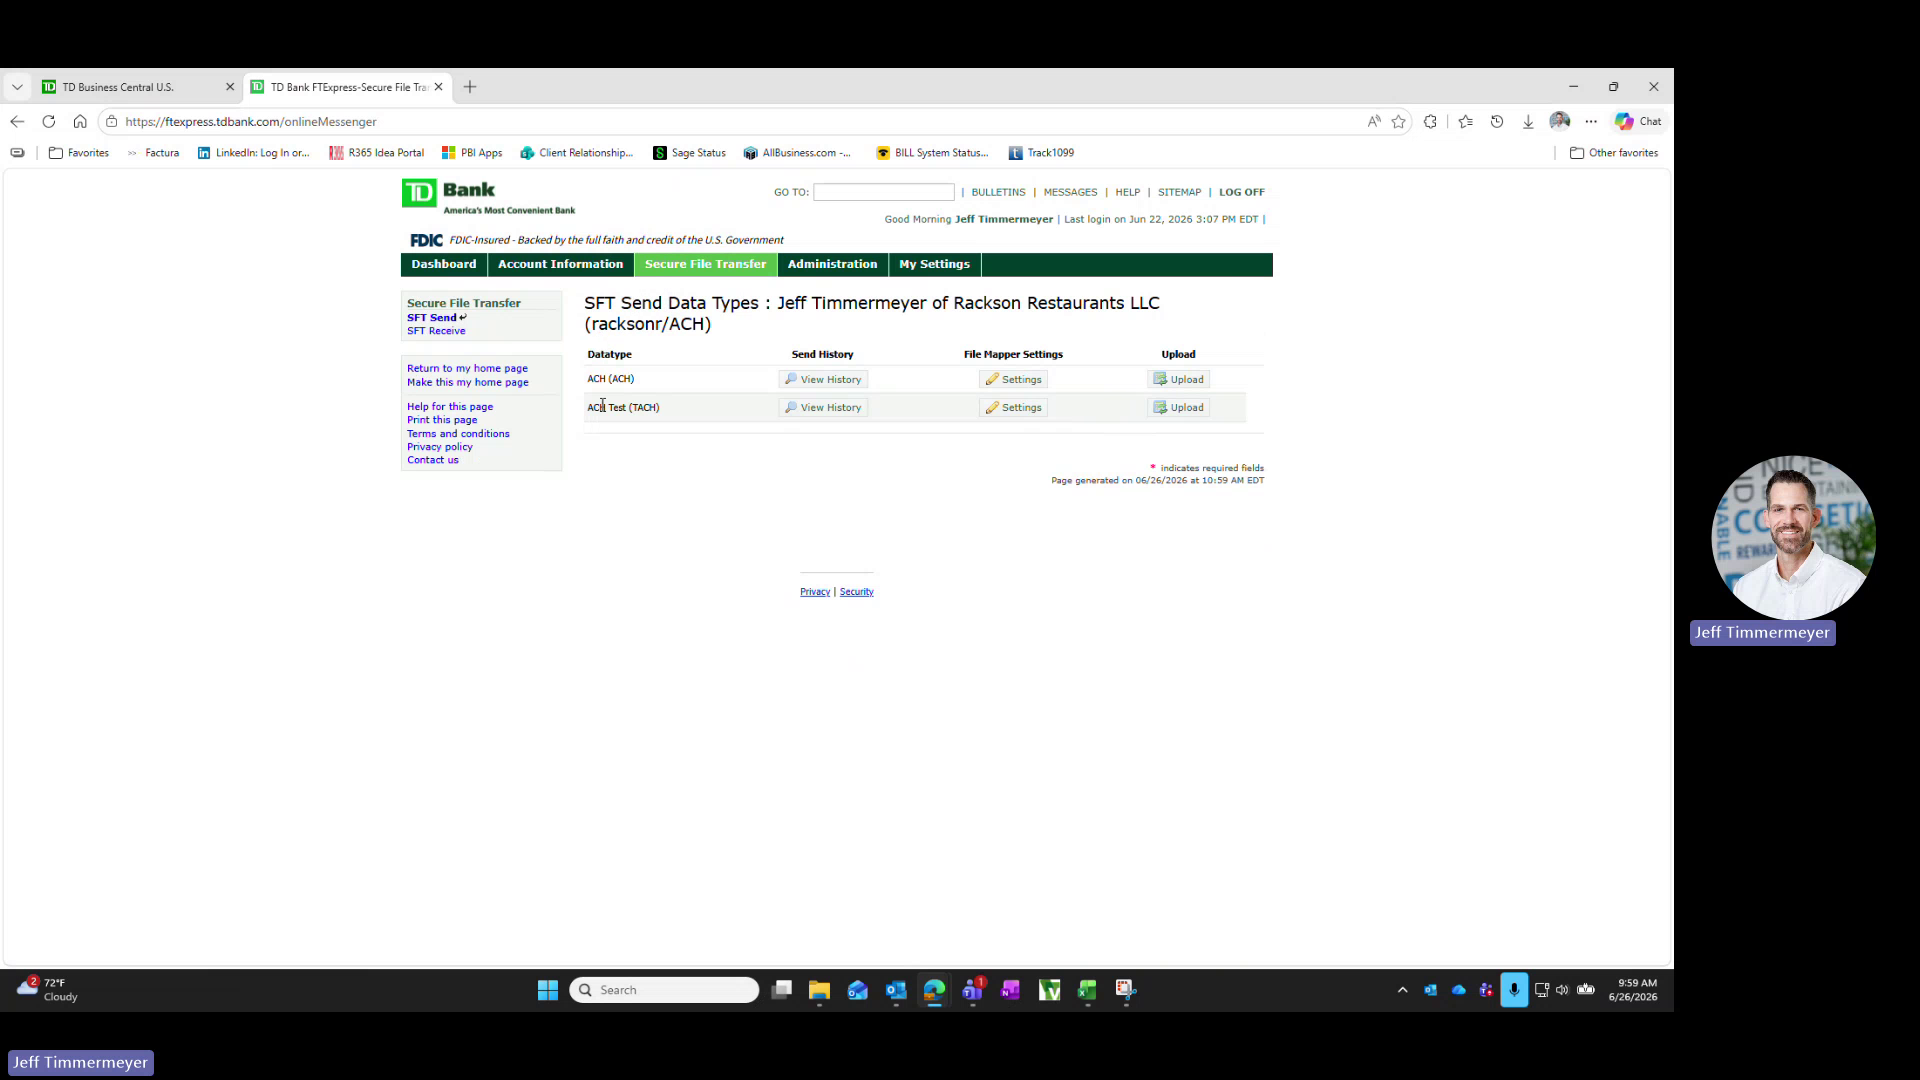
 From the TD applications menu, open **TD Bank FTExpress Secure File Transfer**. Select the **Secure File Transfer** tab, then **SFT Send**. This lists the available data types for upload, including **ACH** and **ACH Test (TACH)**, each with its own **Upload** button.
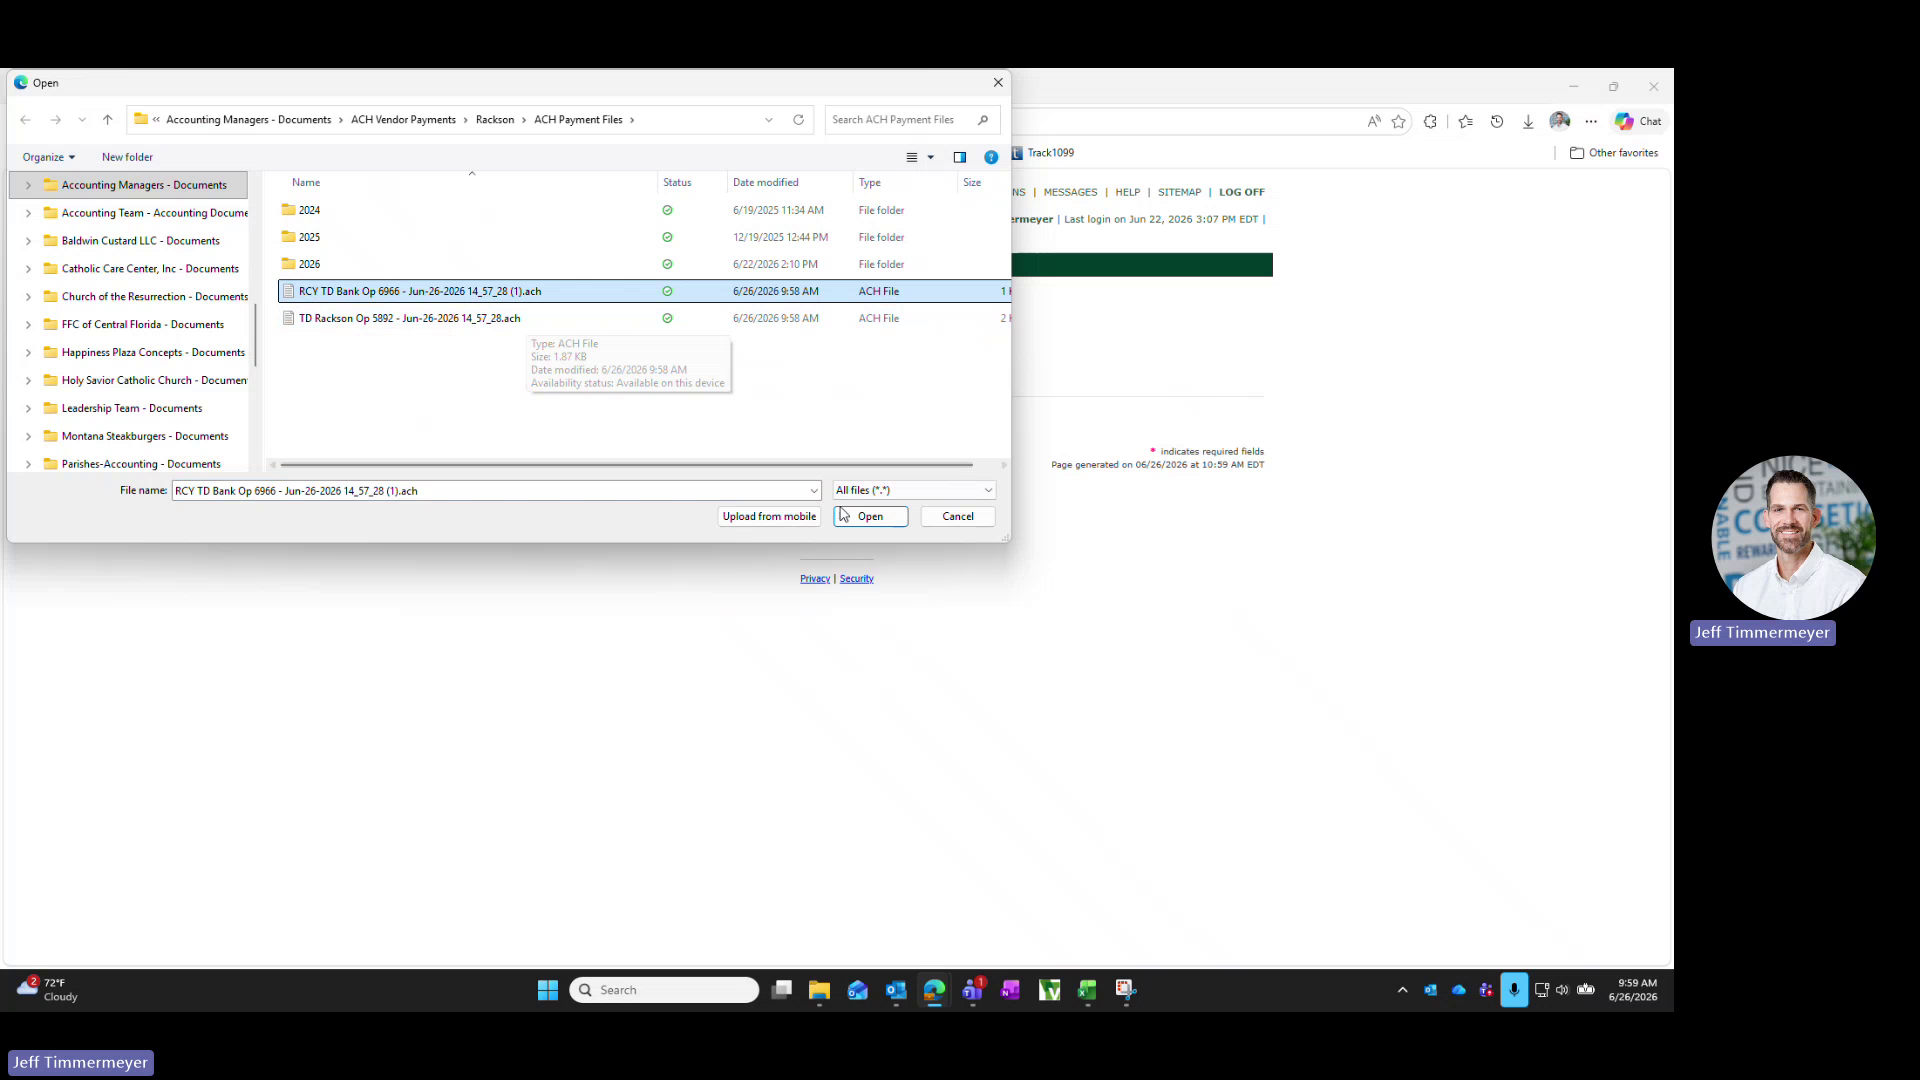
 Click **Upload** next to **ACH Test (TACH)**. Click **Select File** to browse to the OneDrive ACH Payment Files folder, choose the `.ach` file for the entity you are processing, and click **Open**. Then click **Upload File**.
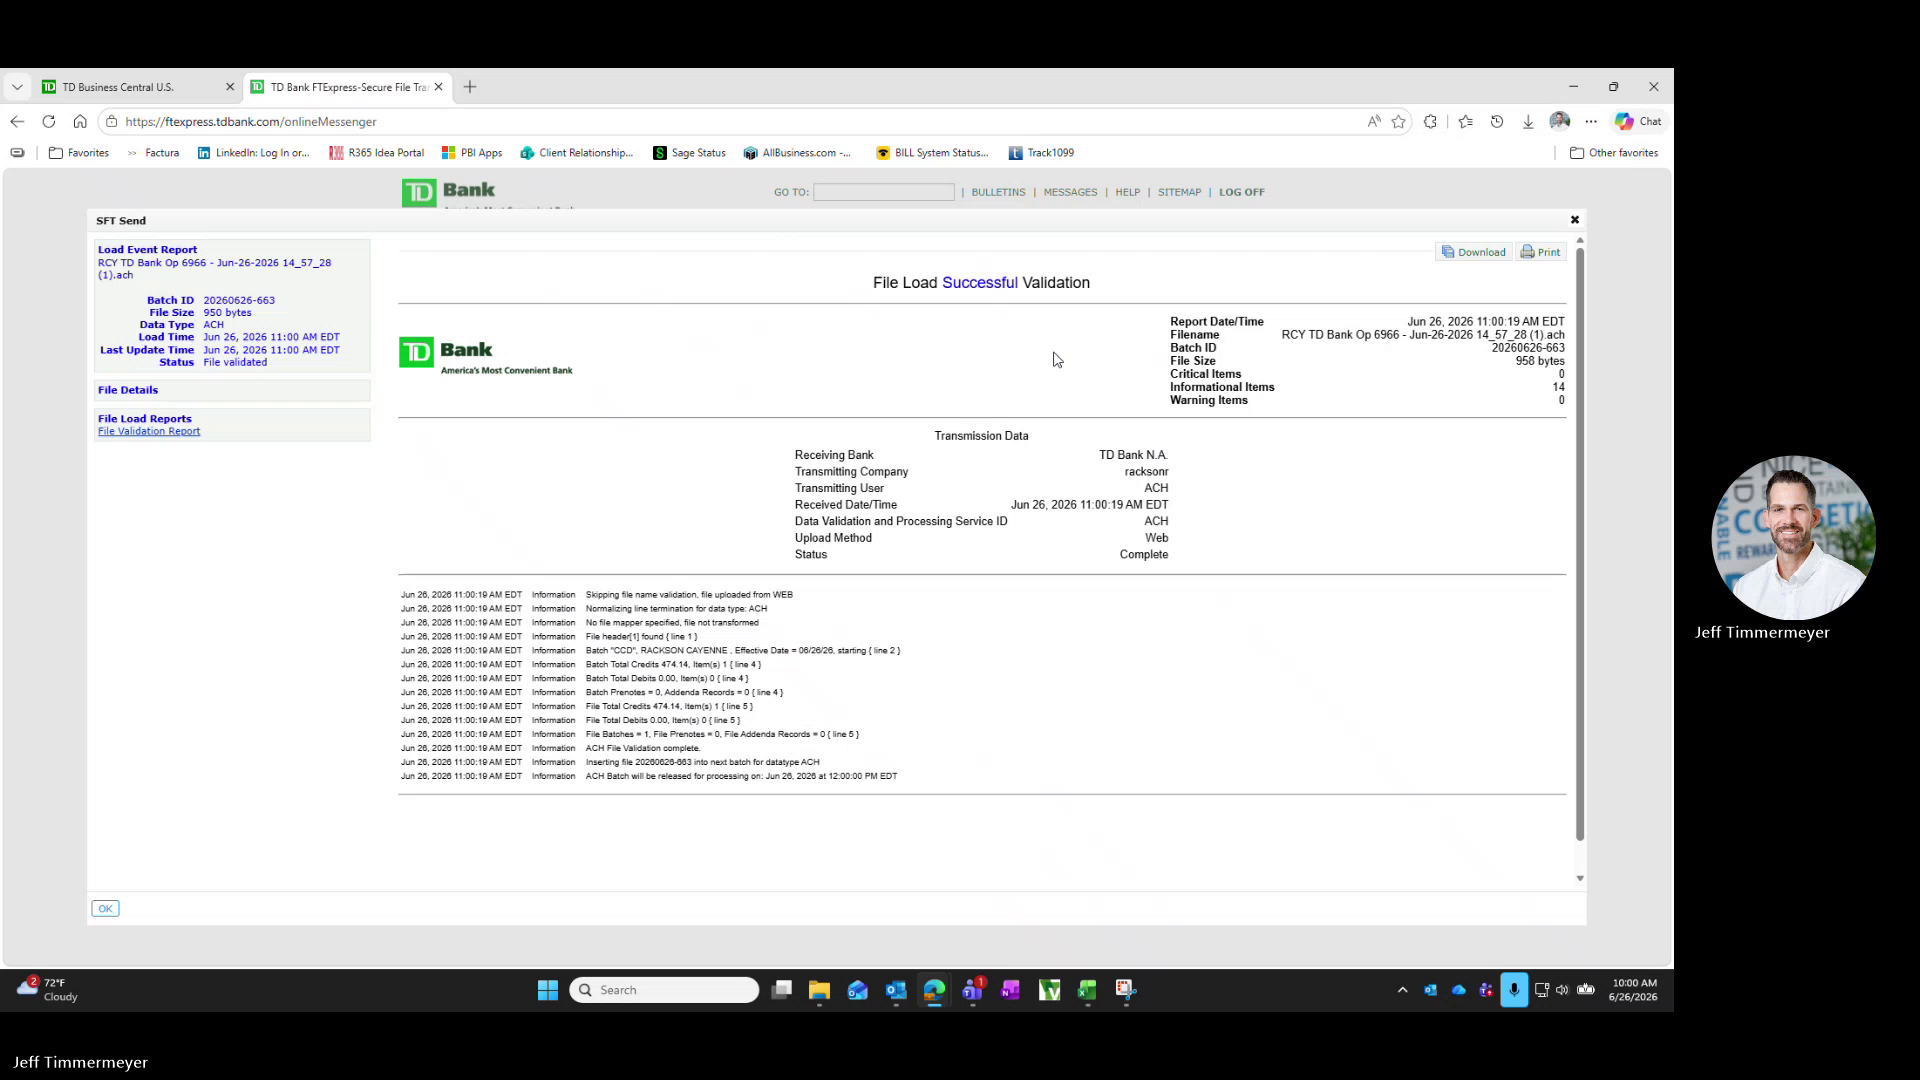
 After the upload completes, a **File Load Validation** report displays. Confirm:
- The status reads **File Load Successful Validation**
- **Critical Items shows 0**
- The **Batch Total Credits** amount matches the expected total for that entity
**If Critical Items is greater than 0, do not proceed to the ACH upload.** Review the file for errors before submitting.
After the upload completes, a **File Load Validation** report displays. Confirm:
- The status reads **File Load Successful Validation**
- **Critical Items shows 0**
- The **Batch Total Credits** amount matches the expected total for that entity
**If Critical Items is greater than 0, do not proceed to the ACH upload.** Review the file for errors before submitting.
 Return to **SFT Send** and click **Upload** next to **ACH**. Select the **same `.ach` file** used in the previous step and click **Upload File**.
**This is the submission that will actually be processed and paid by the bank.**
On the validation report for the **ACH** upload, click **Print**, choose **Microsoft Print to PDF**, and save the confirmation to the same OneDrive folder used earlier.
Name the file using the existing convention:
```text
ACH Confirmation MM.DD.YY (entity).pdf
```
For example `ACH Confirmation 06.26.26 (RCY).pdf`.
Return to **SFT Send** and click **Upload** next to **ACH**. Select the **same `.ach` file** used in the previous step and click **Upload File**.
**This is the submission that will actually be processed and paid by the bank.**
On the validation report for the **ACH** upload, click **Print**, choose **Microsoft Print to PDF**, and save the confirmation to the same OneDrive folder used earlier.
Name the file using the existing convention:
```text
ACH Confirmation MM.DD.YY (entity).pdf
```
For example `ACH Confirmation 06.26.26 (RCY).pdf`.
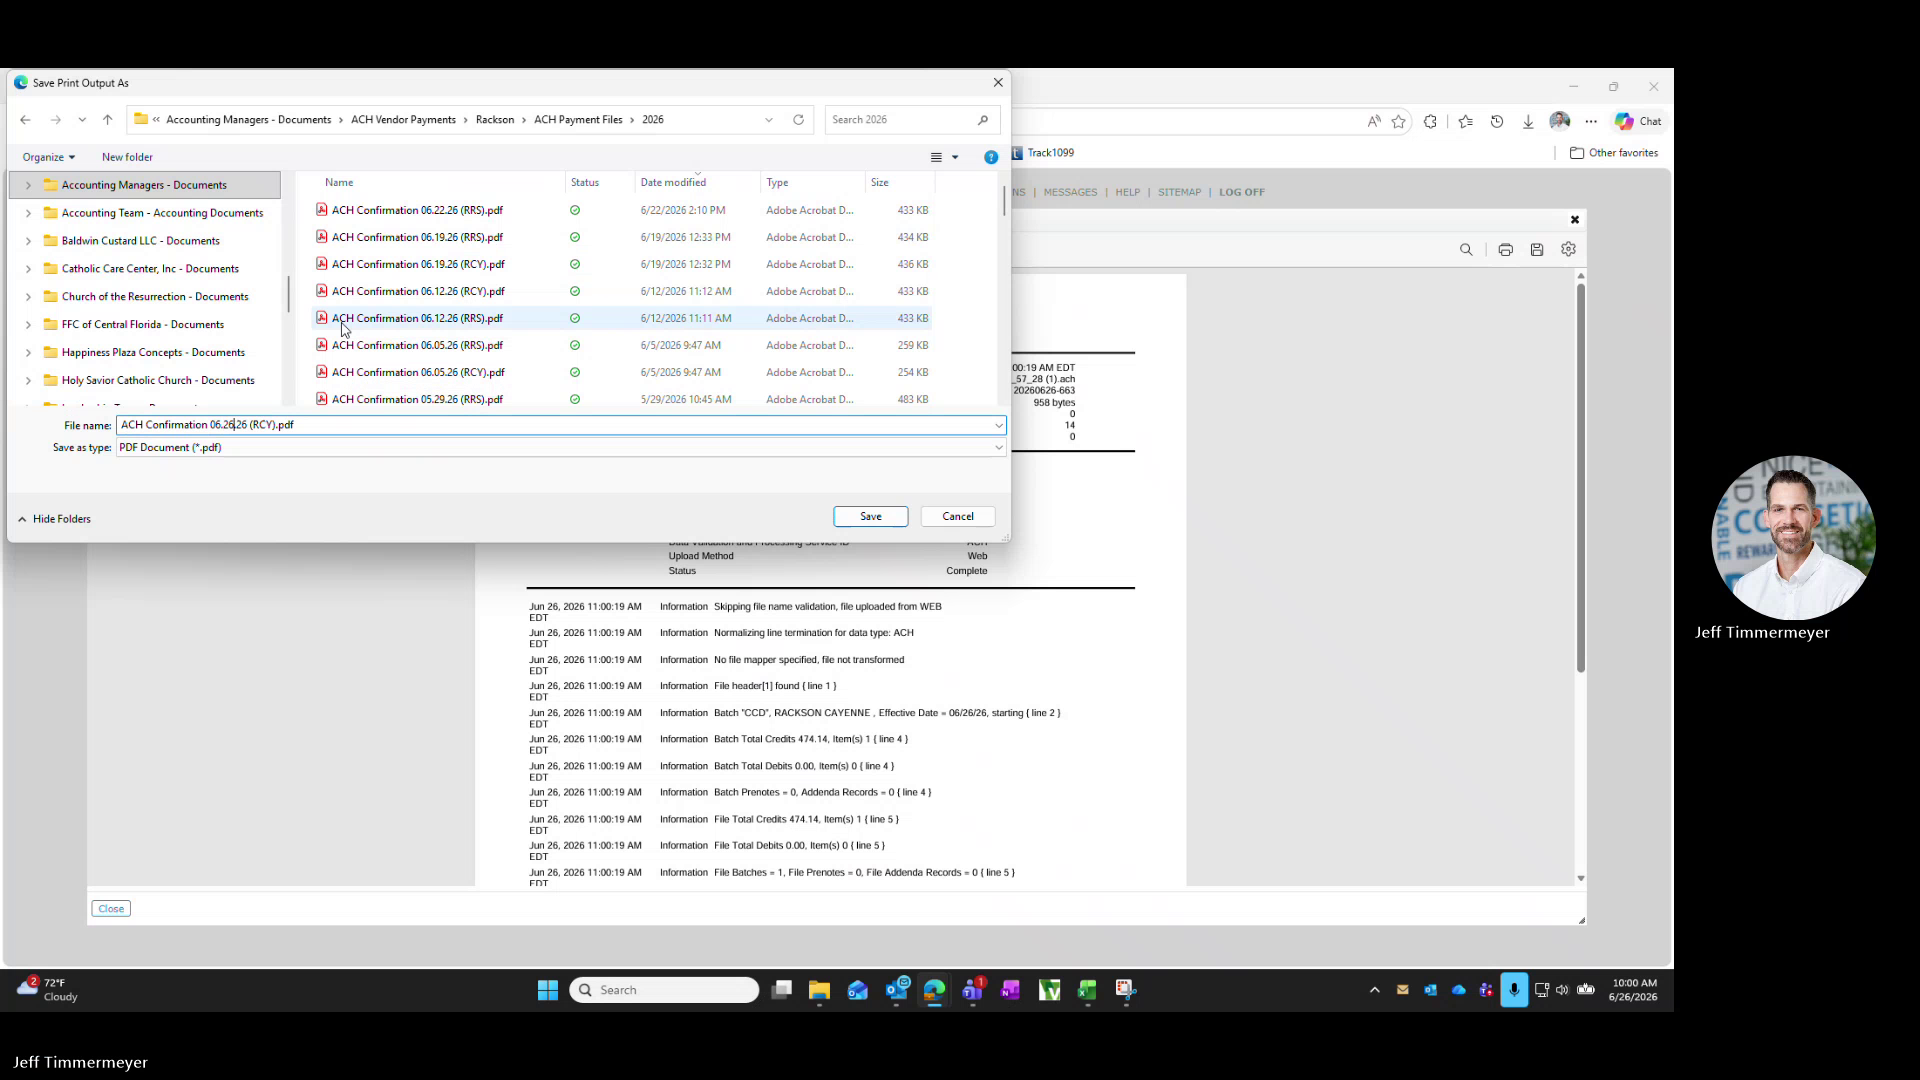 Repeat the upload and confirmation steps for the other entity's `.ach` file, so that **both files are uploaded to ACH Test (TACH) and ACH**, and **both confirmations are saved to OneDrive.**
Return to the ACH payment file list in Sage Intacct. Click **Confirm** next to each of the two **Pending** rows created earlier.
Once confirmed, the **State** column updates from Pending to **Confirmed** and the row **can no longer be deleted.**
Repeat the upload and confirmation steps for the other entity's `.ach` file, so that **both files are uploaded to ACH Test (TACH) and ACH**, and **both confirmations are saved to OneDrive.**
Return to the ACH payment file list in Sage Intacct. Click **Confirm** next to each of the two **Pending** rows created earlier.
Once confirmed, the **State** column updates from Pending to **Confirmed** and the row **can no longer be deleted.**
 Reply to the Teams message or email that initiated the request, confirming the ACH files have been uploaded to the bank and posted in Intacct.
## Summary
Each week: generate the ACH file in Sage Intacct, download and save it to OneDrive, validate and submit through TD Bank's Secure File Transfer portal for each entity, confirm back in Sage Intacct, and notify the requester once complete.
## Related
- [RRS AP and credit cards](/internal/customers/rackson/workpapers/rrs-ap-and-credit-cards) — the AP aging review this payment run draws from
- [AP aging and payroll review](/internal/customers/rackson/review-process/ap-and-payroll) — the AP processing cutoff on WD3
- [Bank (NACHA) file payments policy](/internal/sops/accounting/ap/nacha-bank-file-policy) — the firm-wide policy governing bank file payments
Reply to the Teams message or email that initiated the request, confirming the ACH files have been uploaded to the bank and posted in Intacct.
## Summary
Each week: generate the ACH file in Sage Intacct, download and save it to OneDrive, validate and submit through TD Bank's Secure File Transfer portal for each entity, confirm back in Sage Intacct, and notify the requester once complete.
## Related
- [RRS AP and credit cards](/internal/customers/rackson/workpapers/rrs-ap-and-credit-cards) — the AP aging review this payment run draws from
- [AP aging and payroll review](/internal/customers/rackson/review-process/ap-and-payroll) — the AP processing cutoff on WD3
- [Bank (NACHA) file payments policy](/internal/sops/accounting/ap/nacha-bank-file-policy) — the firm-wide policy governing bank file payments